This are the hardware that i use for this guide:
- Gigabyte GA-P35-DS3R motherboard
- Intel Core 2 Quad 6600 processor
- 4Gb DDR2 ram
- Palit Nvidia 9800GT graphics
The motherboard and processor are over two years old now but still working fine. I have been tempted to upgrade to one of the newer Intel Core i5/i7 processors for some more video encoding muscle, but keep holding off in the hope iLife 10 will make full use of Grand Central Dispatch and OpenCL to give a big performance boost.
There are currently two other main install methods using either a boot CD or copying the install DVD to a flash memory stick. I started looking for Boot CD’s and soon found the GigabyteOSX install disk. This has since been renamed Kakewalk, and now supports even more Gigabyte motherboards and one from MSI. My motherboard isn’t in the supported list but the hardware is close enough for it to work just fine. I haven’t tested the CD with any other hardware so far, but will eventually give it a try with my Home Theatre hackintosh which is still running 10.5.8.
In my first Snow Leopard method I used the Chameleon bootloader installed to the EFI partition, so this time I tried something different. Chameleon 2 RC 4 is the newest version at the time of writing, and the installer here was used which installs to an Extra folder on the Snow Leopard partition. This means the boot files are easier to get to without having to mount the EFI partition. It also means they get backed up when I make a bootable image copy.
The other advantage of using a Boot CD is no longer having to use an existing install to start the process. It’s quicker than my previous method and so far seems to have less issues.
Install method
1. Make a backup. I’ve recently had a hard drive fail and the OSX install became unbootable. Disk Utility couldn’t rescue it, and neither could Techtool as the drive was physically failing with numerous bad sectors. I had a backup, so very little was lost and it didn’t take long to get beck to the previous state. I use two 1Gb drives for my OS disk, with one running and copied to the second every week. I erased one for the new install then had the worrying though that everything was now on one hard drive until the user account was copied across. Next time I do a reinstall I plan to make a second backup before starting.
There are two apps I have used for making bootable backups of a drive, SuperDuper and Carbon Copy Cloner. Superduper is free for complete whole drive backups and $27 to enable Smart Updates (only copy changed files), scheduling and other advanced options. Carbon Copy Cloner does pretty much the same as SuperDuper but makes all its abilities available for free, with a donation is suggested if you like the app.

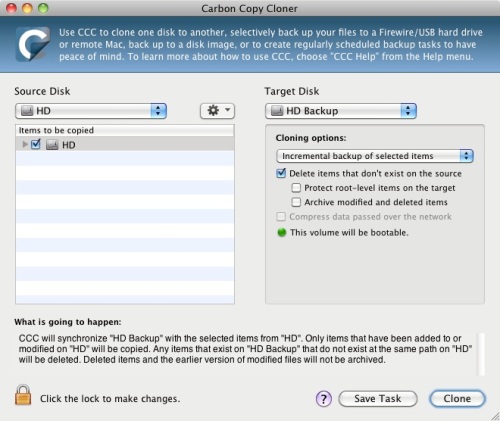
2. Next shut down the computer and disconnected all hard drives except the one being installing to. There’s nothing worse than erasing the wrong drive and having to spend time recovering data.
3. Boot from the Kakewalk CD.

Once the screen showing bootable partitions is shown, swap the Kakewalk CD for the 10.6 install DVD and allow the optical drive to read the disk. Press F5 to refresh then select the Mac OS X Install DVD.

Once the install disk has finished loading select the installation language.

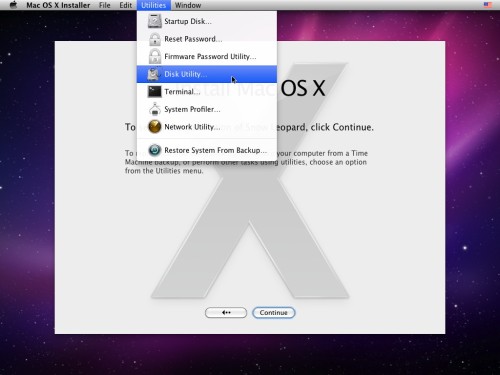
From the menu bar click Utilities>Disk Utility to partition and format the hard drive.
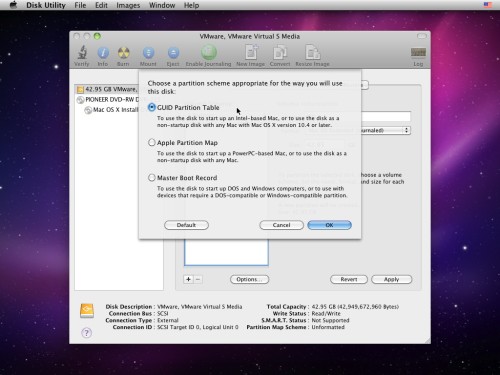
These are the options I used. This install was running in VMware Workstation so the 49.95Gb Disk is shown as a SCSI drive, on PC hardware this will have the usual Drive icon. Click the Options button to check the Partition table is correct.

I always use a GUID partition scheme on a drive containing only Mac OS. Master Boot record is used if the same drive contains Windows or Linux. My preference is to install the different operating systems to separate hard drives if possible as it’s easier.
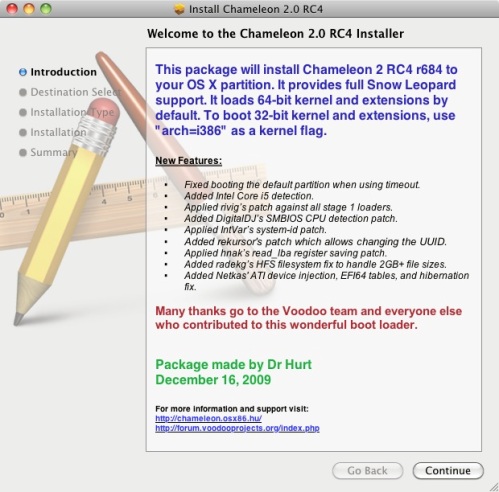
4. Once the install has completed boot again from the Kakewalk CD, this time selecting the partition you just installed to. Once the computer/account setup has completed install Chameleon 2 RC4. There are no options with this version beyond selecting which partition to install to, so no incorrect kernel extentions to worry about.

5. Chameleon 2 RC4 creates an Extra folder in the Root of the drive, and the Extensions folder inside this. I re-used the necessary files from my previous 10.6 install, so my hard drive looked like this.
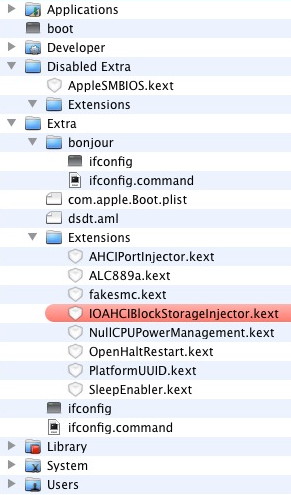 boot is installed by chameleon so doesn’t get replaced.
Disabled Extra is a folder I made to move kext’s to that are no longer required.AppleSMBIOS was originally added under Leopard after a problem with iMovie and DVD Player crashing with disk images, but is not needed for Snow Leopard.
Extra contains the com.apple.Boot.plist with graphics and ethernet strings, created in OSX86 tools. Chameleon 2 includes a graphics enabler that could probably replace the graphics string for my 9800GT, but this method still works so I’ve stuck with it.
The dstd.aml is modified for my system, the first Snow Leopard install guide has links in step 6 that explain how to do this.
The bonjour folder contains a version ofifconfig that gets bonjour working, and thecommand to trigger it.
The files in Extra/Extensions are needed for correct operation of Snow Leopard. These will vary on other hardware, so this part is up to the installer to find out what is needed. This time I haven’t edited the PlatformUUID file with my disk identifier and there have been no ill effects so I suspect the file is no longer needed.
6. Next was the upgrade to 10.6.2 using the combo update from the Apple.com site. The original 10.6
SleepEnabler was replaced with the 10.6.2 version from Netkas’ site after the update but before rebooting.
10.6.2 has been working fine for a few weeks now and most of the problems I previously encountered have gone. The boot CD method is quicker, simpler and easier to modify and backup than the previous install method, so is my new standard install type.
Thanks to Tonymacx86 & MacMan
Escape rooms are live-action team-based games where players discover clues, solve puzzles, and accomplish tasks in one or more rooms to achieve a specific goal (often escaping from the room) in a limited amount of time. The games are set in various fictional locations, such as prison cells, dungeons, and space stations, and are popular for their immersive and interactive nature. They can be a great activity for friends, families, or coworkers looking for a fun and challenging experience.
ReplyDelete